Preping for the 2010 season

15 05 2010

Well the boat is in the water and apart from having the tighten a very slightly loose nut holding the anode everything seemed to be fine with Matilda

It was really fantastic being back on the water, especially with the lovely sunny weather, summer seemed to have appeared just in time.

Even though we were afloat the work had not finished. There was still a huge list to go through just to get Matilda sailable, least of which was to get the mast up. We were incredabley lucky to be able to squeeze on the derrik and get our mast up before the boat that had booked the derrik for themselves were ready. I returned the favour by helping  put the mast up on their boat, so it worked out rather well.

Apart from a couple of tangled ropes and wires the mast went up reasonably easily and although it was far from a text book lift at least it was up and I had ticked another important job off the list.

The only slight set back was the bottom of the forstay did not meet the new attachment on the bow roller, as I had moved from it original postion aft of the anchor locker to try and balance the weather helm we had experienced last year. In the end we attached it on the old fitting and I would come back to the problem later.

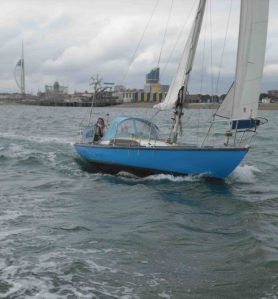
With the mast back up and the boat back on the water I was finally able to get an idea of how the work over the winter had affected the balance of the boat. I could see that she did seem to be floating slightly higher in the water and was definately higher in the stern. This was instantly apparant from in the cockpit as there was no more water coming in from the rear cockpit drain. This was fantastic news and had been one of the major asperations for the winter. I had been very worried that I would not have acheived it because I had been forced to position the fuel tank in the back cockpit locker which was even further back the it had been previously. But it seemed that my concerns had been unneccessary.


The big launch

4 05 2010

Im sitting here hugely relieved as Matilda is now in the water and hasn’t even sunk or anything!

Since the last post a lot has happened again. On the day Matilda was due to be launched the boat lifter broke which meant that our lift date was postponed until the following weekend whilst it was fixed.

This delay gave me a welcome break and also a proper opportunity to celebrate my mothers birthday that had coinsided with our launch date on the 4th.

The extra week gave me a much needed chance to get a lot more jobs finished that I had thought would need to be done on the water.

Stern gland
Forward hatch
Cockpit hatch and wash boards
Tabanacle
Dodgers
Decking fittings

Even so the week flew by and before I knew it I was running around getting the boat ready to go in the water as well as going around the boat with a roll of duct tape, taping the decking fitting holes that still didn’t have a fitting.
As it turned out, because of the relatively shallow draft of Matilda we would be last to be launched as the neap high tide was early in the morning (3.7m at 10.12am) and all the other boats had either deeper drafts or had other requirements that moved them in front. After two failed engines from boats in front, the tide was well and truly streaming out. It meant that it was very touch and go as to whether there would be enough water to float the boat out of the boat lift slings. As it was, we had to drive the lift right to the very bottom of the slipway and just managed to float away. These delays had scuppered my plans of raising the mast on the same day by using the derrik at the bottom of the slipway and instead had to make a hasty retreat to our mooring. As usual though it wasn’t going to be that easy as we discovered that althought the engine had fired up perfectly there was no water coming out of the exhaust. We quickly grabbed the nearest available mooring and turned the engine off. As it turned out it was a simple mistake of leaving a water pipe off when I had been doing some hasty engine reasembley the evening before. After reconnecting the pipe and ensuring the jubilee clip was tightened sufficiently the only evidence of there having being a problem was an engine compartment half full of water that was quickly pumped out.

And that was about it, we fired up the engine again, checked it was all ok, slipped the mooring and motored over to our new mooring which is to be Matildas home for the summer and I could sit back and relax……for now


Crash course in epoxy and much more

28 03 2010

Sorry I haven’t blogged recently. Things have been so busy, I just haven’t had the time or energy to sit and write it all down. I have been keeping notes and now I am compiling them into this posting. As a result of the amount of time not having written anything I have a huge amount to write to get up to date with the progress on Matilda and I apologise as this is going to be more a novel than a post.

I  seem to have spent most of the time since my last post elbow deep in epoxy. Not having used it before, it has been a steep leaning curve of the properties and applications for epoxy. My Dad had lent me an old book that explained the theory of epoxy and glass fibre etc. Not the most interesting but did give me a good insite of how it could be used to good effect.
I went to the local chanderly and bought a large tub of epoxy resin and a tub of micro balloons. Looking at the prices for the mixing containers and other accessories I decided that a trip to the local Tesco’s would be better, where I bought a selection of plastic cups and spoons for measuring and mixing. This was a fraction of the price of the chandlery and has worked fine, I would recommend people look to do the same if you have a lot of epoxying to do.

I started by filling all the old holes in the deck from the old fittings that had be removed in preparation of painting the deck. I have an idea to change the layout of the fittings so would not need a lot of the holes. This was done with a thick paste of epoxy and micro ballons. After it had set I sanded tham all back so thay were flush and smooth and then refilled any voids/imperfections that were left. As I went round the boat with the paste, more and more imperfections seemed to appear, various nocks and scraps that I hadn’t taken notice of before suddenly seemed an easy job to fill but soon added up and took a while to get done. The boat now looks like it has been used as target practice by the army, with a multitude of patches all over it. I also used the filler to repair the mistake on the starboard sliding hatch mount. I had accidently cut too deeply into the side during the frenzy of sawdust that had obscured my vision when I was using my circular saw the cut the side.
To do the repair I screwed into the side of the wooden and adjusted the depth of each screw until they were at the required depth to be filled to match the other sides. I then applied several layers of epoxy. I found that because there was a significant amount of filling require it was going to need me to build it up in layers to stop it all slumping to the bottom. Once I had filled it to the required depth I sanded it back to the screws and knew it would be the correct depth.
I have found some new aluminium track from a well known DIY store which were almost the perfect length and just needed to sand back the end slightly. I mounted these by drilling and countersinking holes in the track and screwing it down so that the screw heads are flush with the track and do not obstruct the sliders 

One weekend I got on board to smell something a bit “funny”, it took me a minute to realise it was diesel that I could smell. I lifted the floor boards and saw it was half filled with diesel that had leaked from the fuel tank. This resulted in me having to spend the day pumping out the deisel from with a hand bilge pump that I borrowed from my parents boat and scrubbing the bilge with various cleaning products. I pumped it into buckets before pouring it into large diesel drums that I had saved from work. It was mixed with all the dirt and grime from the engine compartment and bilge and I could only looked on with disappointment as approximately £40 of deisel was wasted.
However after leaving it overnight, I saw that the diesel had seperated from the water and rubbish that had been mixed in, so I was able to slowly pump the top layer of diesel into another container and in this way was able to save about three quarters of it. I had already been adviced to get a more substansial fuel tank instead of the flexable plastic one currently used. After researching on the internet, it was between Tek-tanks and plastimo, I initially went with Tek-tanks as their office was just up the road. I measured the space available and thought I could just about squeeze a 40 litre tank in, but after I had brought it and taken it to the boat, I found it was slightly too big. The next size down is the 33 litre but they didn’t have any in stock, which made up my mind for me. Plastimo 33 litre tank it is!

The lead for the keel has been reposition back in to the keel to ensure it was as low and compact as possible. I then filled all the spaces that were left with expanding foam to stop any rattling around. I’ve made the battery box and coated it in epoxy to waterproof it and stop it from rotting in the potentially damp bilge. I located the box in the keel and put the batteries in, wrapped in a plastic bag. I then squirted more expanding foam around the box, to give it a good snug fit. All thats needed now is to trim the wires to the correct length, and connect them to the battery terminals (note: to make life easier, label the end of each wire before you lead them foreward, as I now have the problem of working out which wire is which)

I have also done a quick repair to the rudder after it was damaged during the lift in for the winter. I decided that due to the limited time I would not be able to modify the rudder how I would have liked, so decide to do the minimum repair required, and then build a new one when I have more time, hopefully in time for next year. So with this in mind I simply cut off the damaged wood where it had snapped upto the first hinge. Once this was removed, the remaing bottom of the rudder seemed in good condition and so I simply rounded off the bottom and faired it in a bit, before giving it a coat of epoxy to waterproof it.
I then re-attached the pintles. As the bolts that had been used with the pintels were very corroded, I had to use new ones, but to save some money, I used some stainless steel studding from Screwfix, which I cut to length and bolted together with nylock nuts. This worked out at a fraction of the price of buying dedicated bolts and it should work just as well. All that remains is to lift and hang the rudder and give it a lick of antifouling

The locker lids have also come on quite well. I have glued and fixed in the mounting strips in the two rear lockers that I intend to fill in. It was simple a case of cutting some wooden batterns to size and gluing then in with epoxy. I have cut some  plywood to size to fit into the locker space. I mixed up some epoxy and microballoons and used it to build up the level so that the plywood would sit flush with the rest of the cockpit seat. To ensure I got a good fit, I again wrapped the plywood in a plastic bag and positioned it in place and then reached underneith the smooth out the epoxy. Once the expoxy had started to set, I removed the plywood and peeled off the plastic bag and this left a perfect impression in the epoxy. I will use sealant and screws to fix it in place as this will give me the opportunity to remove it if I need to get to the throttle/ bilge pump or fuel tank on the other sided.
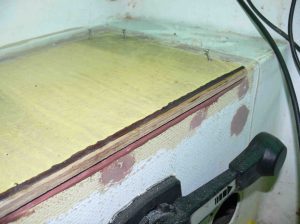
The front lockers are going more slowly but I have made the starboard side locker lid and most of the frame work for it. All that is required now is to epoxy coat the few remaining bits and give it a couple of coats of deck paint. I have noticed that the lid is not a perfect fit in the space. I had expected some alterations to be needed and shouldnt be too difficult to get right when I attach the hinges

Then all of a sudden I had a huge set back. I was walking past the boat and noticed a chunk of antifouling had flaked off. I gave it a light tap and more come away. I called over some other members and they had a look around the boat and more areas were discovered. I was adviced that all the antifouling had to be removed! As I had planned to simply apply a couple of coats over the old antifouling, this was a major job to undertake that I hadn’t wanted to do this year.
But I was lent a scraper and I set about it straight away. It all looked like it would be quite quick, but as my arms got more tired and I came across areas that were better attached, progressed slowed. It took me the best part of two days to completely remove the antifouling. On the plus side, under the antifouling was a good layer of VC tar, which I hadnt realised was there, which could account for the boat not having any signs of osmosis. There were areas on the hull, in particular around the bow that had resesses, which might have been from previous osmosis repairs that had not been finished very well, but I filled these with epoxy and microballoons and sanded them back to give the hull a nice smooth finish.
One of the theories for why the antifouling had come away was because the VC tar has a waxy/glossy finish which the antifouling didnt stick to very well. With this in mind I sanded the entire hull to give the new primer a good key. This took another day and a half as the tar had been applied quite badly and was very bumpy and need a lot of work to get it all smooth.
Now I have a nice smooth hull I will apply a primer and then two coats of antifouling, with another along the water line as recommended, and hopefully this should work better, fingers crossed.
This was a suprisingly big job even for such a small boat and really worked my arms and shoulders. I wouldn’t advice this job to anyone unless absolutely neccessary and has plenty of time. If you do, get a very good face mask due to the harmful antifoul dusk that is generated and gets everywhere!

The new launch date for Matilda is the 4th April, with gave me a bit more time to get finished and is much better than the 20th March date that I was originally given. It is still frustrating that I haven’t been able to get a lot of the work that I had hoped to get done finished but I guess I should have expected this.

I will be attaching more photos to accompany the text above soon


Work during the snow

15 01 2010

It’s been a very frustrating time for me due to all the snow making it impossible to do any proper work. The only small upside is that it has given me additonal time to work on Matilda as I wait for the snow to melt.

Work has continued at a slow but steady pace, and I am anxious to be able to start ticking off some jobs instead of having so many half started jobs on the go.

To start with the cover over the boat had taken a battering, with so much snow it had finally given up and collapsed. When I had build the frame to support the cover I hadn’t anticipated the possibility of so much snow falling. It took some effect to clear the snow off the top, lift the battered cover and attach additional supports to strengthen it.

I decided to get on with one of the major jobs, which was to finish clearing out the steel from the keel and get the new lead in. I ended up attacking the remaining steel with a drill set on hammer action. A bit worrying being so close to drilling holes through the hull, but it seemed to do the trick or at least loosen it up, because it started coming out in large chunks and after a few heavy blows with a hammer and chisel the last of it was finally removed.

I weighed the buckets of removed steel on some bathroom scales and it came to an almost perfect 55kg. If you have ever wondered what 55kg of rusty steel looks like, here is a pic for you

I have been considering the new lead to replace the steel for some time and finally came to a conclusion. This was not to put any more lead in but to fill the keel void with another very heavy piece of boat equipment, the boat batteries. This would mean they are filling two tasked, (ballast and providing electricity). Mutli-tasking is something that is very useful on a boat this small as it can save a lot of valuable space.
Matilda has three batteries on board, one to start the engine and two leisure batteries. I had considered remove one leisure battery as we have very few electrics on board and with the wind generator, two seemed excessive. They had been mounted under the the bunks and although this keeps the weight reasonably low and in the middle of the boat, weren’t really contributing very much. I weighed the three batteries and they came to 40kg (close enough to the required weight for me). By positioning them in the keel I could keep all the batteries and never have any worries with power and also avoid having to buy any more lead, with the added bonus of saving 55kg into the bargain.

During the removal of the steel I had taken out a couple of chunks of lead that were in the next section back along the keel. I realised that I could easily remove all the lead from that section aswell, as it was only held in with expanding foam. I could then repack the lead along the bottom of the keel of both sectons and place the batteries on top. Due to the size of the batteries I decided to position the two leisure batteries in the back section and the starter battery in the forward section. I stacked alot of the removed lead further forward to ensure the weight distrution was about right. I am in the process of building some plywood boxes to house the batteries and then to hold them in place will fill the outside with expanding foam.

What I hadn’t considered fully was the cost of rewiring the batteries, as I would need longer battery cables to reach further along the boat to their new positions. As I needed 3 metre lengths and costing £3.70/m + VAT the cost quickly sored to over £50. Still cheaper than buying  lead but only just. It wasnt a big job to disconnect the old cables and reconnect the new ones and now I just need to drill a few holes and run the cables under the bunks to the batteries and wire them up and we’ll be in business.

It was at this point that I also decided that the boat needed a good clean up as everything was covered in saw dust and wood shavings and this was making it very difficult to work. I removed all the tat from the decks and grabbed the petrol leaf blower  from the van. In no time at all the boat was clean, if a bit smokey as the exhaust fumes had no where to go. Saved alot of time and effort though. Everything suddenly seemed a lot more under control and presentable, giving me a much needed boost of morale


End of 2009, 2010 begins!

4 01 2010

Merry Christmas and a happy new year. Ok I realise I’m a bit late saying it but I’ve been busy working on the boat during the holidays and it’s now I’m back at work that I have some free time 🙂

Progress report:
The last couple of days before the Christmas holidays were very cold and icy and an advantage of having my own business is having some staff that if its impossible to work I can get to help on my boat. This worked out very nicely as Stewart who was helping me has trained as a carpenter and alot of his skills are easily transfered to working on a boat. With his help we were able to remove the last few fittings that needed two people. This including the winch mounts which we had to attack with a hammer and chisel and completely destroy as all other attempts to remove them had proved fruitless.

We also made an attempt at rationalising the wiring as there are great coils of wire all over the boat and this was starting to annoy me. After investigating for a while I decided it might be better to leave this particular job until next year when I would have more time (espicially as most of it seems to be working), one interesting thing was found though. We found that the DSC/VHF was not wired in properly, as it isnt wired into the GPS in any way. This combined with the fact that it was never wired to the aerial at the top of the mast, might have explained why it didnt seem to be working very well last year! Another important job to add to the list.

I have also made a good start at making the new locker lids for the cockpit. I found some nice hinges at the local chandley, although the price made me gulp a bit. £11 each! As I needed two per locker I had to spend £44, this made me very greatful that I had decided to cover over the back two as I would have needed the same number again.
After trimming the locker openings to shape and squaring them up, I took some careful measurments and set about designing the new lids. I wanted them to be flush with the rest of the seat and to be able to drain any water away in to the self draining cockpit, as most boats have. I’m making it all out of 6mm exterior ply which I will coat in epoxy to waterproof it and then paint it the same colour as the rest of the deck. I’m currently making reasonable progress cutting out the twenty something individual pieces for the two lids, and to see how it was going I took the parts I had cut out down to the boat and assembled them in the locker. The picture shows the parts so far slotted in but without glueing. It only needs some slight modifications to make it fit perfectly which I was very pleased with.

Unfortunately whilst I have been working on the boat the main hatch compartment has court my eye and well, I couldn’t resist replacing this as well. My reasoning for doing this was because I didnt want to go to all the trouble of repainting the deck and have a fairly ugly hatch spoiling the look for a whole year. Also to make  the existing hatch look respectable would require a lot of work in it’s self. I have designed a nice simple new hatch and am half way through modifying the track on either side. I’m hoping it shouldn’t take too long to re-make and work so far has gone well.

I’ve also been busy in the garage with a polisher getting all the stainless steel fittings that have been removed from the boat cleaned up. This proved a bigger job than first thought. The dirt and salt was so thick and encrusted on, I had to use a chisel and carefully scrap the worst off  before getting some proper polishing attachments for my electric drill and attacking them with that. Even then it took along time for each fitting but I am slowly working my way though and am starting to get a good technique going, so shouldn’t be too many more evenings work.

As ever, time seems to be slipping away at an astonishing pace and I have a feeling that this is going to be the quickest winter ever. I have found out the the boats in our compound will start being lifted back in to the water from May 26th until April 10th. Only a couple of months to go!


Work continues

16 12 2009

Its been a couple of weeks since my last post and thought it time to update you on the progress so far.

Getting the last of the fittings off has proven more difficult than first hoped, but it was going too smoothly so I half expecting to come up against some tricky fittings. The fittings left are the two primary winches and mounting blocks and the fore and aft mooring cleats and fairleads. Other than that though its looking very empty. Its amazing how many screws and nuts and bolts have been used and have managed to fill a couple of boxes with them all. Im really looking forward to being able to put the electric drill in forward gear instead of constantly going anticlockwise.

I’ve also removed the cockpit locker lids and anchor locker lid in preparation of making some replacements. I had thought to replace all four cockpit locker lids but have now decided to cover over the smaller rear lids and just use the front ones.

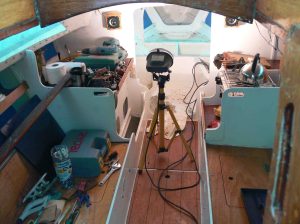
Below decks I found that the two bench seats on either side of the main saloon have had a second layer of plywood attached, presumably it was the easiest way of putting in new lids to get to the storage area undernieth. I have removed the top layer and will make proper compartment lids to fit the original seat tops.

I have also made a start on replacing the steel ballast in the keel with lead.  The long keel is split into sections along its length and the front section had steel ‘punchings’ (small steel disks, a bi-product of a manufacturing process) filling it. Over the years these have rusted and expanded, pushing up the floor and potentially damaging the hull. I was advised it needed doing when I bought the boat and thought it was something better done sooner rather than later.

Firstly I had to remove the toilet, which came out quite easily by undoing a couple of large screws holding it down and cutting off the in and outlet pipes. As the toilet was in a bad condition and needed a service this wasn’t a problem and also gives me the opportunity to move the toilet from being mounted on the side of the boat to the middle of the boat pointing backwards. The reason for this was because it helps even out the weight in the boat and also should make accessing the toilet more easy. (idea taken from Bill’s boat blog)

After that I had to cut out the fiberglass floor which was surprising thick before starting the dig out the steel punchings. Its started coming out quite easily but as I got lower it become more and more compacted and difficult to dig out. I managed to get out about one and half bucket fulls of steel and now there is only a small amount left. Once I have finished digging out the last of the steel I will weight the backets and replace it with the same weight in lead before rebuilding the floor with ply and glassing it in.

Well thats it at the moment, hoping to get the last bits off this weekend so I can get started on building the lockers etc. Still enjoying it but most importantly looking forward to seeing if all this work will make the big difference I am hoping for next season


Lets get started

26 11 2009

The aim of this year is to make the boat as easy to sail and as fast as possible whilst still comfortable. To improve accommodation to make her more comfortable when we go away for the weekend.

The reason for trying to improve Matilda’s performance are two-fold. Firstly I intend to race her next year, with aspirations of winning a few pots to put on the mantlepiece.
The other reason is because my girlfriend is still new to the world of sailing and hasnt quite come around to the idea of sailing for a number of hours simply for pleasure and looks as it as a mode of transport that shouldnt take too long so we can get to our destination. By getting the boat as fast as possible I hope to be able to widen our sailing area as well as make the journey more enjoyable, as lets face it, no one likes to be the slowest boat on the water, watching everyone glide past whilst you bob along, knowing you’re going to be the last to the pub.

So here I am, I’ve spent the first weekend working on Matilda since she was lifted out.

To start with I had to construct a canopy to keep the worst of the weather off and keep me dry and slightly warmer over the winter.
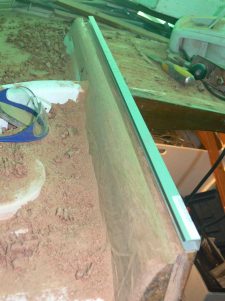
I had got some plastic pipes in BandQ and a cheap 8mx5m Tarpaulin in Wickes. After experimenting with the best design of the pipes to give maximum strength I came up with the design as seen in the pics,  which so far seems to be working well. (also note the home made cradle, which I was quite proud of)

I then had to remove the rudder as it was damaged whilst it was being lifted out in to the yard (I now know that the stern strop has to go further forward!) This was a simple process of removing the tiller, then the pins from the hinges and then lifting it down. Im starting to see the advantages of having a stern hung rudder over more modern and complex modern designs. I also decided to remove the hinge brackets attached to the hull as there was significant corrosion and I wanted to check everything was ok, as it’s a fairly vital peace of kit that I didnt want breaking at the wrong time. Im glad I did as although Im sure it would have been strong enough, the bolts were quite badly worn and corroded.  This also made it easier to get to the prop to remove, as this had got pretty messy and I wanted to get it cleaned up. 

Then came the process of striping all the deck fitting off the boat, as one of the jobs I have planned is to repaint the deck to get rid of the nasty tobacco yellow colour currently visible. This was made easier with the help of my girlfriend, who came and got stuck in for the weekend. Together we  managed to get a lot of the fittings off with relative ease, and even got a bit carried away and started striping out the interior aswell before finishing for the day on Sunday.

As I suspected, as the work continued my plans have changed and adapted. I am now considering  a folding or feathering prop to replace the existing 3 bladed prop, and am currently investigating the possible options.

You could say that I have been well and truly bitten by the bug and this project seems to be dominating most of my thoughts at the moment. Ill keep you posted with further developments soon


Starting the blog

24 11 2009

This is my first ever blog! I was inspired by Bills boatblog, as he has carried out similar work on his Folksong as I have planned for mine. I was able to gain a lot of knowledge and ideas from reading his blog and I hope others can do the same from mine.
Myself and my girlfriend are the new owners of a slightly rundown Folksong 25 (a small sailing cruiser) which we are in the early stages of its first winter refit. We have many plans for her and over the coming months I hope to share our experiences with you.